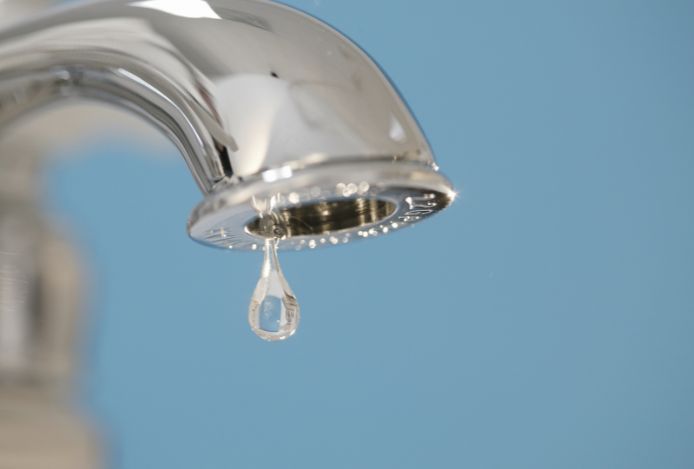
Is Your Dripping Faucet Driving You Crazy? Here’s How to Repair It

TL;DR: Don’t let a dripping faucet ruin your day! Our DIY guide helps you fix it easily, saving money and preventing water damage. Learn to identify your faucet type, gather the right tools, and shut off the water supply. We walk you through step-by-step disassembly, inspection, and replacement of faulty parts like O-rings and cartridges. Reassemble carefully, test for leaks, and if needed, call the pros at Rootin Tootin Rooter for expert help.
Is your dripping faucet driving you crazy? Fixing it can seem like a big task, but turning your plumbing nightmare into a DIY success is within reach with the right guide. You can stop the annoying drip, save money on bills, and avoid water damage to your home.
Consider the impact of repairing a leaky faucet: Simply turning off the tap while brushing our teeth can save 3,000 gallons of water annually. This is why we wish to ensure you confidently tackle this common home improvement task.
Our guide contains information on identifying the type of kitchen faucet you have and explains the detailed disassembly and inspection of parts. Here’s how to repair it in detail.
Identifying the Type of Faucet
The first step is identifying the type of faucet you have. Each faucet type, be it ball, cartridge, ceramic disk, or compression, has its unique mechanism and parts that could be the source of leaks. Recognizing the type of faucet streamlines the repair process and ensures you’re looking in the right places for potential issues.
Start by inspecting the faucet for any visible logos or brand names. Grime can often obscure these, so a thorough cleaning might reveal hidden identifiers. If the brand isn’t immediately visible, shining a flashlight on the faucet or checking under the sink for labels on the supply lines can provide clues.
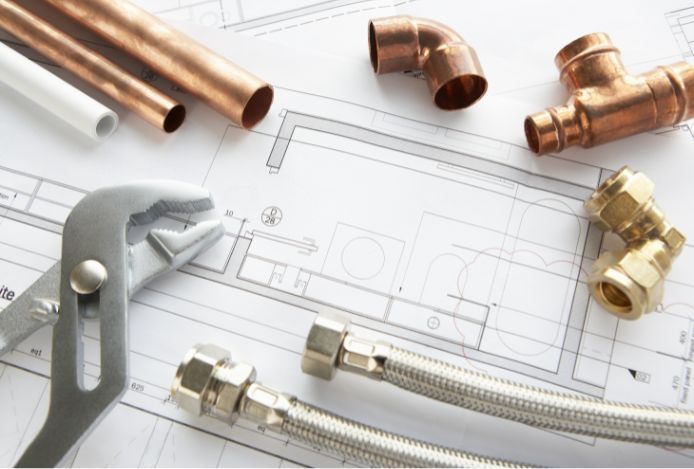
Tools and Materials Needed
Preparing to repair a leaky faucet involves collecting the necessary tools and materials to guarantee an efficient fix.
Essential Tools:
- Adjustable wrench
- Flathead and Phillips-head screwdrivers
- Hex key or Allen wrench
- Needle-nose pliers
- Slip joint pliers
Specialized Tools for specific tasks:
- Faucet Reseating Tool
- Stem & Cartridge Wrench
- 4-in-1 Faucet Seat Puller
- Telescoping Basin Wrench
Materials for Replacement and Maintenance:
- Replacement O-rings and washers
- New cartridge or stem
- Faucet repair kit
- Silicone faucet grease
- Plumbers tape
The O-ring and washer are typically the main sources of leaks in faucets. Having a faucet repair kit on hand does come in handy as it includes assorted stem washers, screws, and O-ring seals, covering most repair needs.
Turning Off the Water Supply
Shutting off the water supply is a must-do step in repairing a leaky faucet. This guarantees a secure and moisture-free fixing procedure. Locate the shut-off valves. These are typically found under the sink, whether in the kitchen or bathroom. You’ll find two valves, one for hot water (often marked with red) and one for cold water (usually marked with blue or white).
Rotate both valves clockwise to stop the water supply to the faucet. If these are missing or not working, turn off the main water supply to your home. This valve is typically located where the municipal water line enters your property or close to the water meter.
Preparation for Repair
If shutting off the main water supply is necessary, turn on a faucet at the lowest level of your home to empty any residual water from the pipes. If the main supply is off, prevent any potential damage by shutting off the water heater.
Position a bucket beneath the sink to collect leftover water, keeping your work area dry and secure. This simple step can prevent water from spilling over onto your cabinet floor.
Disassembling the Faucet
Disassembling your faucet might seem like a task reserved for professionals, but with the right approach, you can do it on your own. Here’s how to tackle it step by step.
Handle and Cartridge Removal
Begin by removing the cap on top of the faucet handle, which is often concealed but can be pried open with a flathead screwdriver.
Inside, you’ll find a Phillips head screw securing the handle. Hold the handle firmly and unscrew it to avoid any damage. Raise the handle upwards to detach it, revealing the cartridge or stem below. Capture a photo of the assembly to use as a guide when reassembling.
Faucet Body Disassembly
Disconnect the hot and cold water supply lines with an adjustable wrench. If they’re tight, applying penetrating oil can ease the removal process.
Next, tackle the mounting nuts or screws with a basin wrench. If they resist, a combination of penetrating oil, gentle tapping with a hammer, or applying heat may loosen them.
Gently pull the faucet body straight up. If it sticks, a plastic putty knife can help pry it loose without damaging the sink surface. Laying out the parts in order as you remove them simplifies reassembly.
Inspecting and Replacing Faulty Parts
Upon disassembling your faucet, closely inspect each component for signs of wear or damage. This helps in diagnosing the exact cause of the leak. Key parts to check include O-rings, washers, cartridges, and the faucet’s aerator.
O-rings and Washers
These are often the culprits behind leaks. Look for any signs of brittleness, cracks, or obvious wear. If they seem damaged, substitute them with new ones corresponding in size and shape. A dripping faucet can often be attributed to a deteriorated O-ring or washer.
Cartridges and Valves
If the faucet uses a cartridge system, pull out the old cartridge and examine it for signs of mineral buildup or damage. Match the old cartridge’s size and shape, or note the faucet’s manufacturer and model number to find a suitable replacement. Cleaning with distilled white vinegar can help remove mineral deposits for valve issues.
Faucet Aerator and Sprayer
Low water pressure or irregular spray patterns can indicate sediment buildup or damage. Detach the aerator or sprayer nozzle and check for any debris or signs of damage. Cleaning with vinegar or replacing the aerator can often resolve these issues.
If your faucet still leaks after these replacements, it may indicate more complex issues, such as loose parts, broken plumbing, or severe corrosion in the valve seat. Consulting a professional plumber might be the best course of action in such cases.
Reassembling the Faucet and Testing
After you’ve replaced or repaired the necessary components, reassembling your faucet is the next crucial step. Begin by carefully placing each part back in its original position, reversing the order you followed during disassembly.
Ensuring that every component fits snugly and aligns correctly is vital to avoid any misplacement that could lead to leaks.
Once the faucet is reassembled, gently turn on the water supply. It’s wise to do this gradually, allowing the system to pressurize slowly. Let the water run for a few minutes without initially attaching the aerator.
Key Takeaways: Repair Your Dripping Faucet
This guide carefully examines the process, from identifying the type of dripping faucet driving you crazy to the final touches of reassembling and testing for leaks. It aims to empower you with the knowledge and confidence to tackle a common yet troublesome household issue. Should you encounter a plumbing challenge that feels beyond your reach, don’t hesitate to seek professional assistance.
The expertise of seasoned professionals at Rootin Tootin Rooter can provide peace of mind and guarantee a solution that stands the test of time. Licensed, bonded and insured, we fix your problem the first time around. Contact us today and get a free service quote!


Leave a Reply